Getting Started
So You Want An API?
- We offer instruction on how to install JDK 17 and Maven
- We also offer links to Docker Engine installation
Instantiating the Template
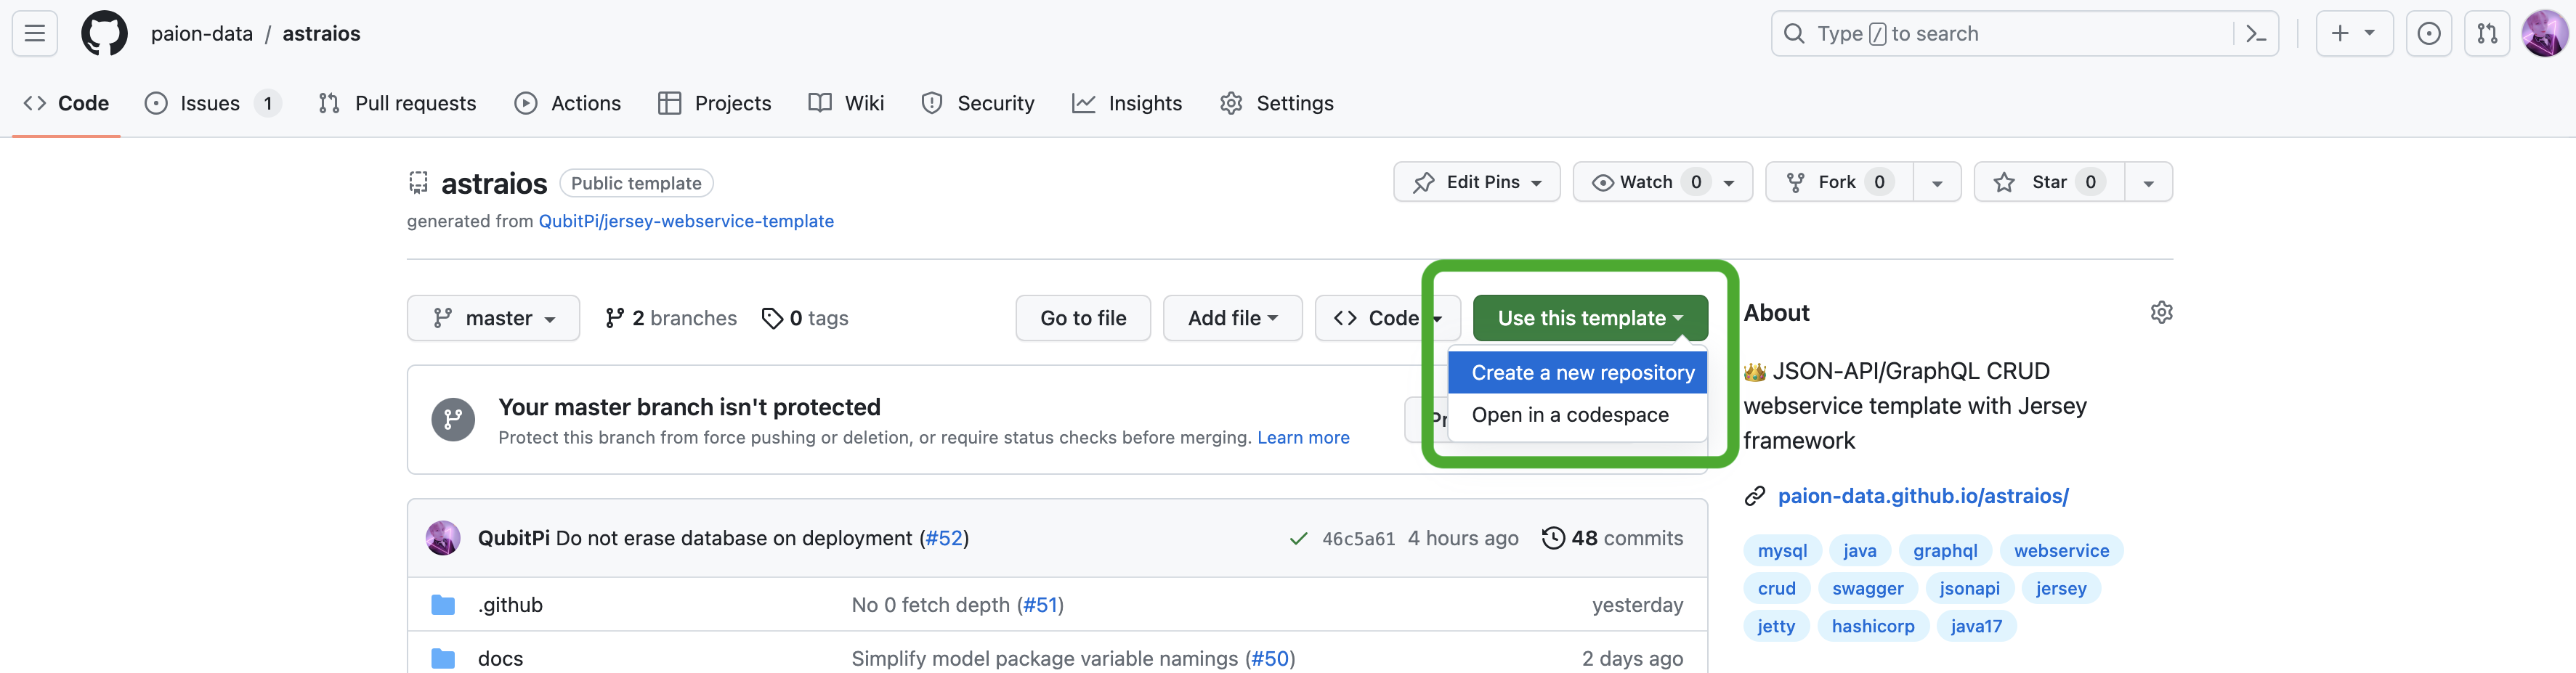
Please visit Astraios GitHub and either
- clone the repo with
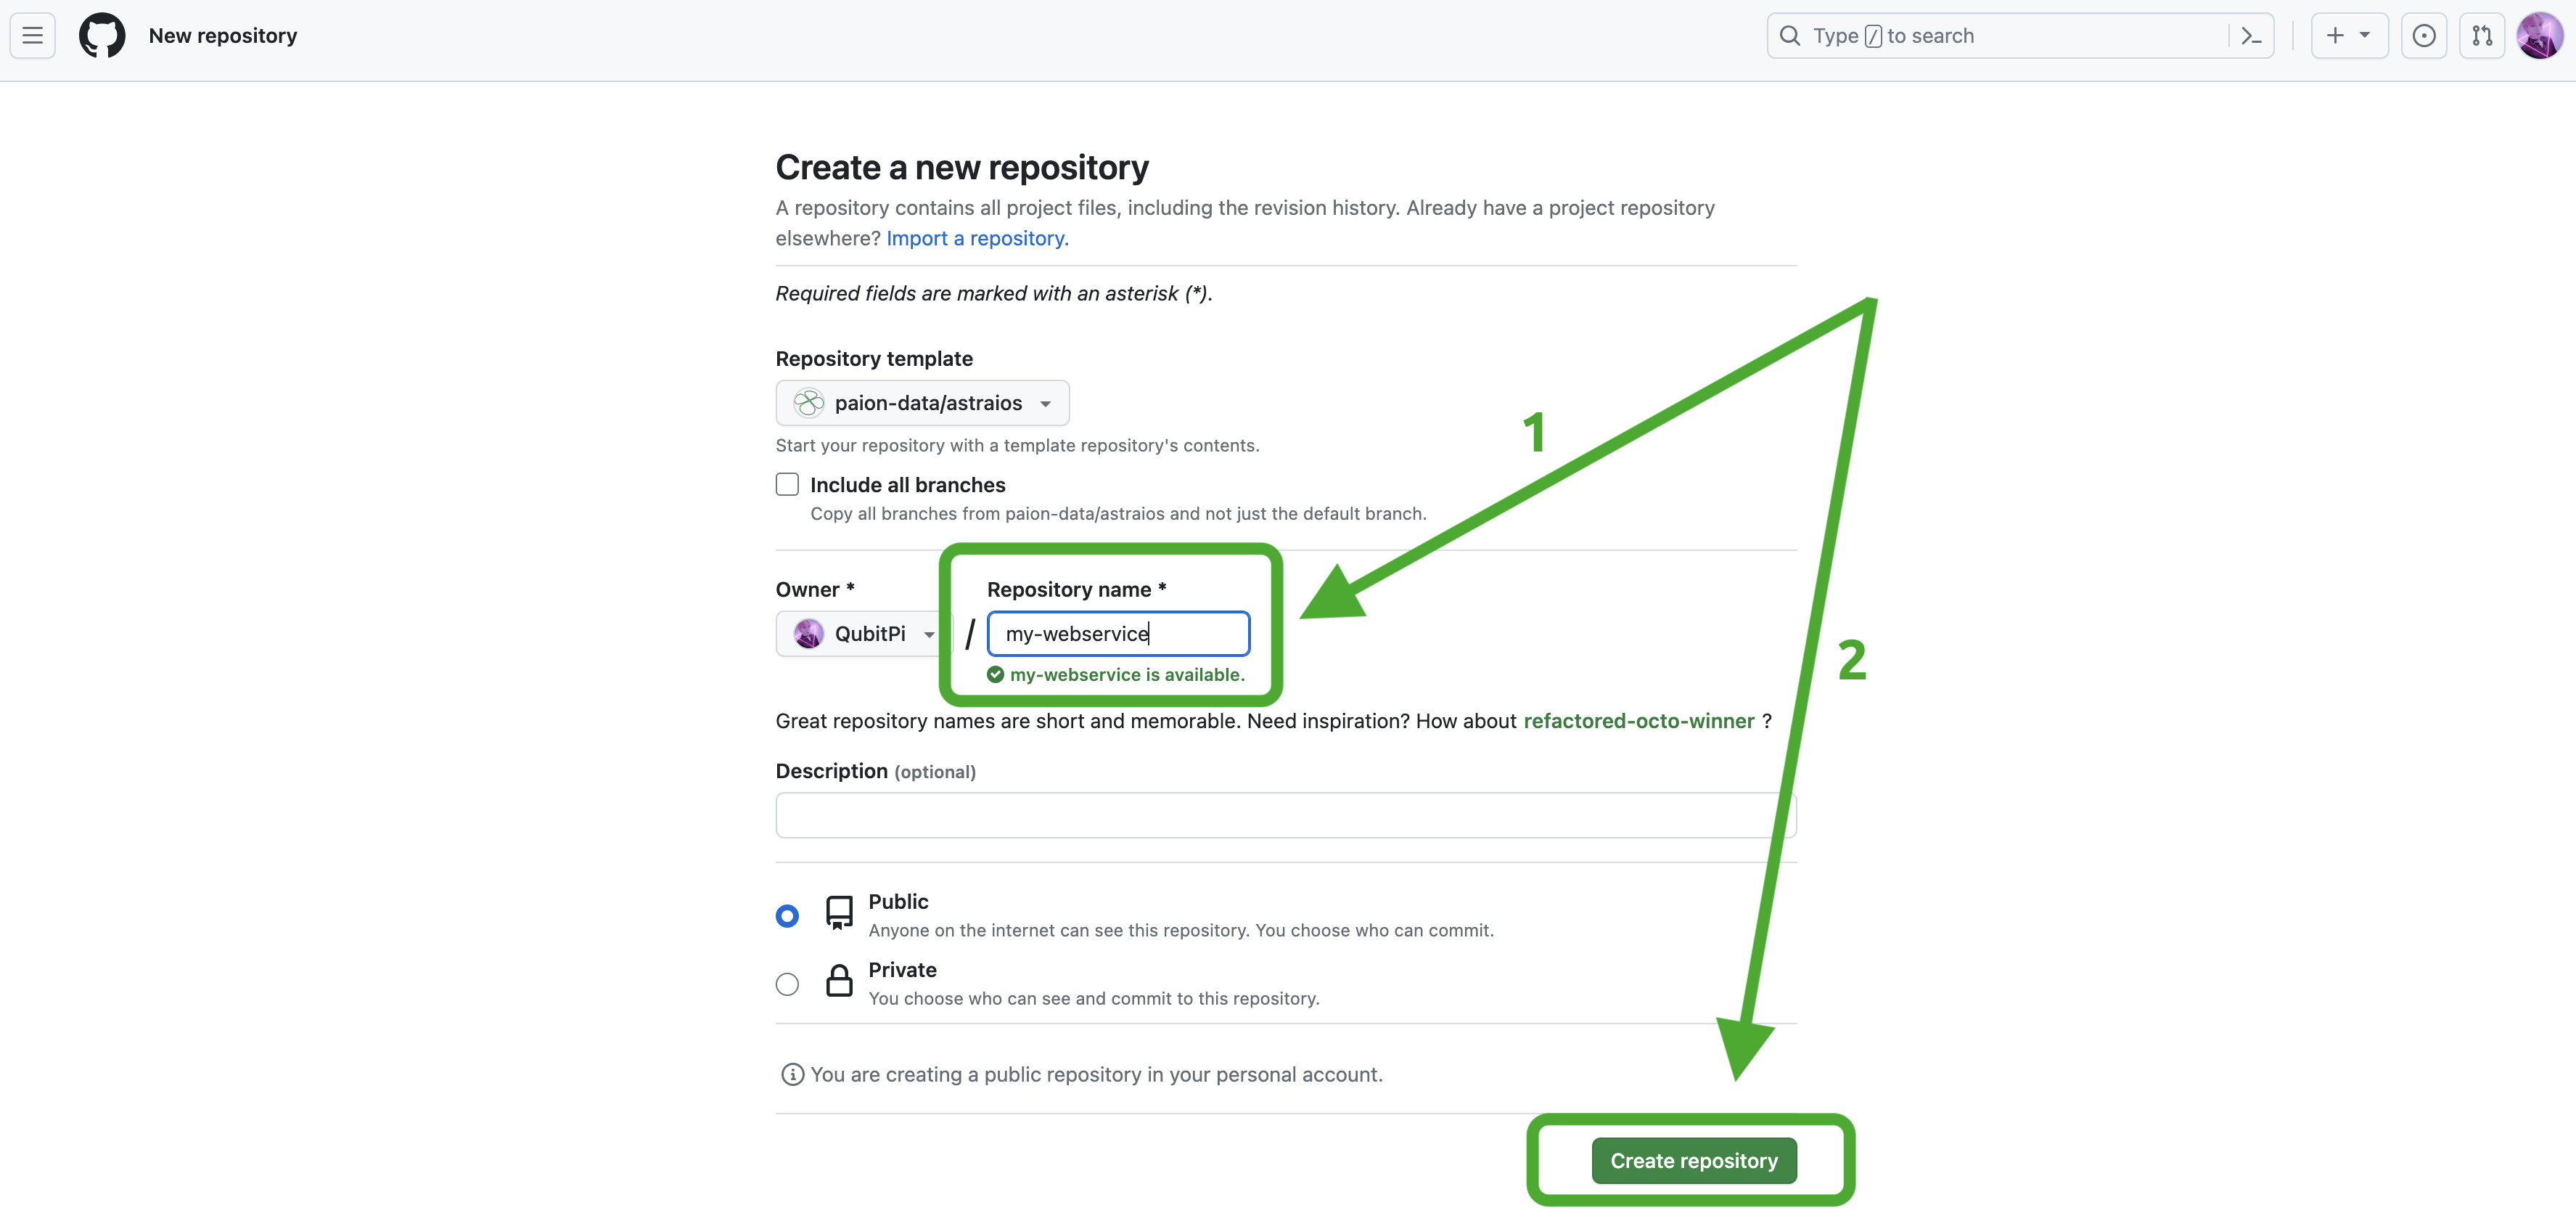
git clone git@github.com:paion-data/astraios.git, or - make it a template instantiation with our own webservice name by doing the following:
Creating Models
Astraios models are some of the most important code in any webservice project. Our models are the
view of our data that we wish to expose. In this example we will be modeling a book since most people have a
high-level familiarity with books in life. Our Book model has been packaged as a JAR file in a
separate Maven project. It has already been
published to Maven Central and will be installed in this tutorial by default so that user don't need to do anything
to set up the data model at this moment 
Running
With data models defined, can run my-webservice
cd my-webservice
mvn clean package --settings settings.xml.example
MODEL_PACKAGE_NAME=com.paiondata.astraios.data.models docker compose up --build --force-recreate
Note that the settings.xml is the Maven config file for loading the data model
com.paiondata.astraios.data.modelsis the name of the model in the aforementioned data model project- The data model is loaded via a special-purpose Maven settings file called
settings.xml.example, which instructs my-webservice to load data models. It's essentially the regular ~/.m2/settings.xml:
If everything runs successfully, we should be able to see the following output at end of the command line output:
web-1  | 25-06-2024 04:41:53.654 [main] [Elide, ] INFO  o.a.coyote.http11.Http11NioProtocol.log - Starting ProtocolHandler ["http-nio-8080"]
web-1  | 25-06-2024 04:41:53.676 [main] [Elide, ] INFO  o.s.b.w.e.tomcat.TomcatWebServer.start - Tomcat started on port(s): 8080 (http) with context path ''
web-1  | 25-06-2024 04:41:53.709 [main] [Elide, ] INFO  com.paiondata.astraios.App.logStarted - Started App in 14.755 seconds (process running for 16.004)
A MySQL database container has also started alongside and is accessible via
mysql -h localhost -D elide -P 3306 --protocol=tcp -u root -proot
All data is persisted in a database called elide
Writing Data
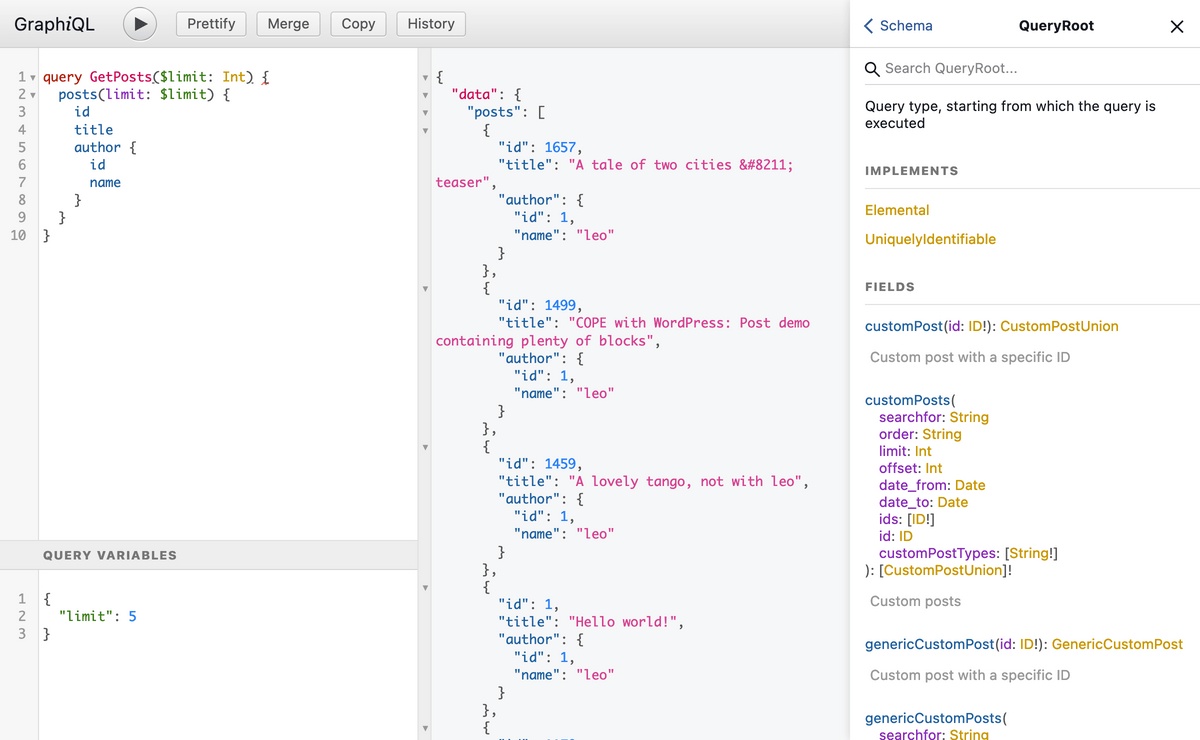
GraphiQL offers a user-friendly UI for issuing GraphQL queries and displaying query responses. We can use it for the API call below.
-
Mac uses Homebrew
brew install --cask graphiql -
Windows binary can be downloaded from the release page. Then install the downloaded
.exefile -
Linux users can follow the official documentation
When installed, the GraphiQL user interface looks like the following:
Inserting Data
We have defined our views on the database and exposed those views over HTTP. Next let's use cURL to put data in the database.
- JSON-API
- GraphQL
- (GraphQL) Query
curl -X POST http://localhost:8080/v1/data/book \
    -H "Content-Type: application/vnd.api+json" \
    -H "Accept: application/vnd.api+json" \
    -d '{"data": {"type": "book", "attributes": { "title": "Pride and Prejudice" }}}'
curl -X POST "http://localhost:8080/v1/data" \
    -H "Content-Type: application/json" \
    -H "Accept: application/json"  \
    -d '{ "query" : "mutation { book(op: UPSERT, data:{title: \"Pride & Prejudice\"}) { edges { node { id title } } } }" }'
mutation {
  book(op: UPSERT, data:{title: "Pride & Prejudice"}) {
    edges {
      node {
        id
        title
      }
    }
  }
}
When we run that cURL call we should see a bunch of JSON returned, that is our newly inserted object!
- JSON-API
- GraphQL
{
   "data":{
      "type":"book",
      "id":"1",
      "attributes":{
         "title":"Pride and Prejudice"
      }
   }
}
{
   "data":{
      "book":{
         "edges":[
            {
               "node":{
                  "id":"4",
                  "title":"Pride & Prejudice"
               }
            }
         ]
      }
   }
}
Looking at Our Data
- Web Browser
- JSON-API
- GraphQL
- (GraphQL) Query
Simply open up our favorite browser and hit http://localhost:8080/v1/data/book
It is recommended to view result with some JSON formatter browser extension for better viewing experience
curl "http://localhost:8080/v1/data/book"
curl -X POST "http://localhost:8080/v1/data" \
    -H "Content-Type: application/json" \
    -H "Accept: application/json"  \
    -d '{ "query" : "{ book { edges { node { id title } } } }" }'
{
  book {
    edges {
      node {
        id
        title
      }
    }
  }
}
Modifying Data
Notice that, when we created it, we did not set any of the attributes of our new book record. Updating our data to help our users is just as easy as it is to add new data. Let's update our model with the following cURL call.
- JSON-API
- GraphQL
- (GraphQL) Query
curl -X PATCH http://localhost:8080/v1/data/book/1 \
    -H "Content-Type: application/vnd.api+json" \
    -H "Accept: application/vnd.api+json" \
    -d '{"data": {"type": "book", "id": "1", "attributes": { "title": "Emma" }}}'
curl -X POST "http://localhost:8080/v1/data" \
    -H "Content-Type: application/json" \
    -H "Accept: application/json"  \
    -d '{ "query" : "mutation { book(op: UPSERT, data: {id: \"1\", title: \"Emma\"}) { edges { node { id title } } } }" }'
mutation {
  book(op: UPSERT, data: {id: "1", title: "Emma"}) {
    edges {
      node {
        id
        title
      }
    }
  }
}